![]()
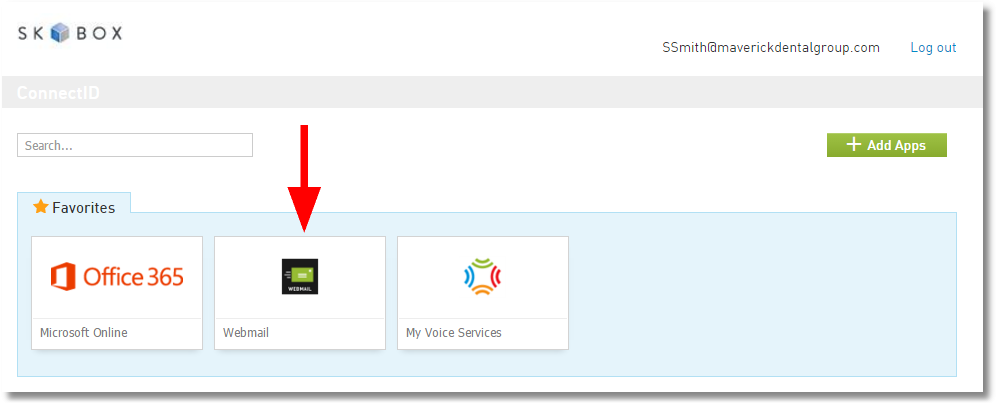
| • | From your ConnectID log in, click on the Webmail app. |
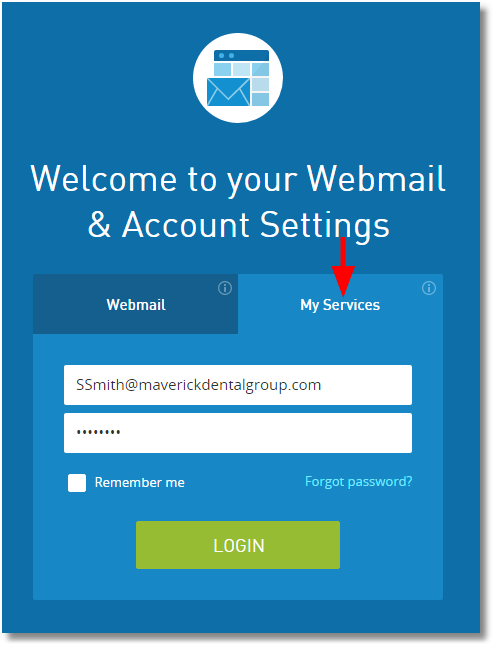
| • | Then select the My Services tab and choose Login. |
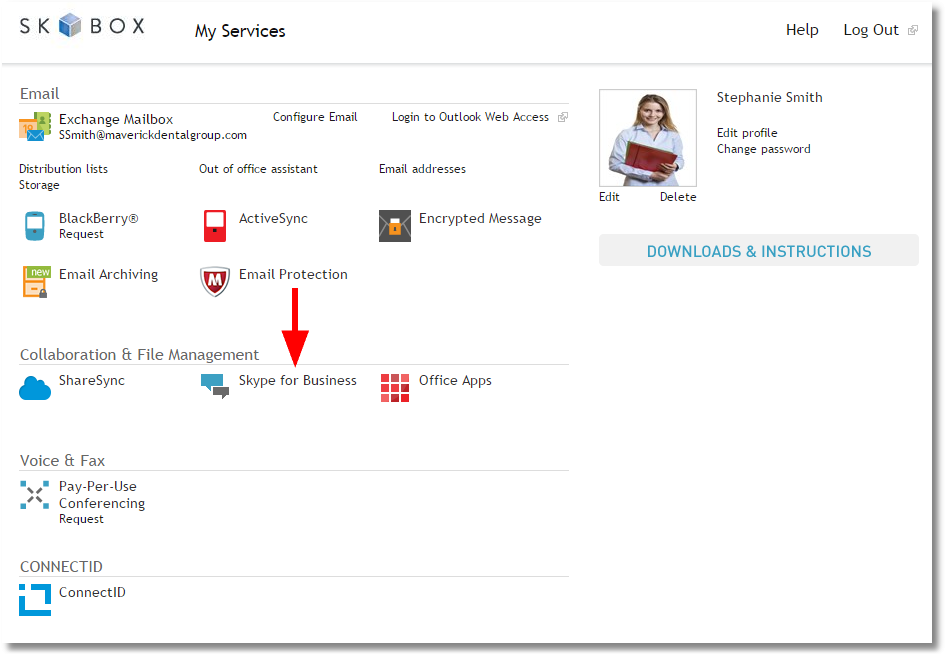
| • | Under Collaboration & File Management click on Skype for Business. |
| • | The Skype for Business Settings window will appear. Choose the proper client to download for your operating system. ***Windows users, please choose the Automatic Setup Skype for Business 2013 Client. |
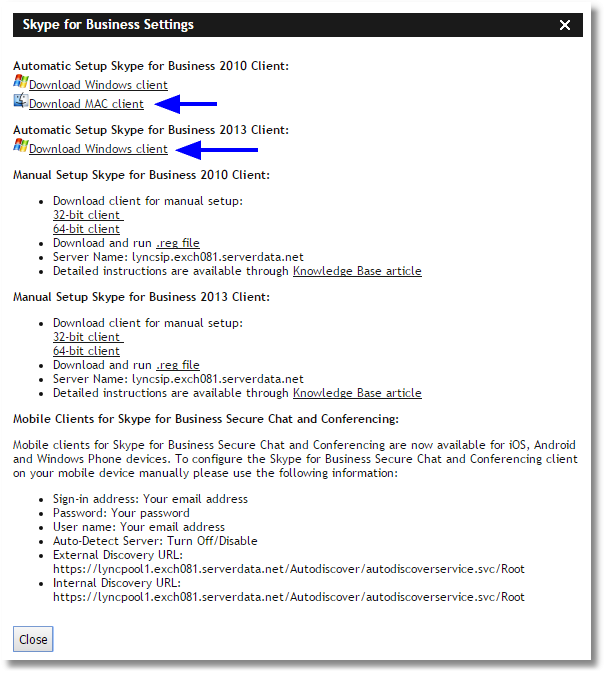
| • | Follow the screen prompts to download and install Skype for Business. |